













Description
Custom Straight Tuck End Boxes: When the Front Panel Is the Brand
Every folding carton has a front panel. The straight tuck end box treats it differently from every other folding carton format.
On a reverse tuck end box, the bottom closure flap tucks from the back of the box toward the front, which means its raw board edge is visible along the bottom of the front panel when the box is assembled. For most retail applications this is acceptable. For premium retail, high-end cosmetics, and any product where the front face is the primary brand expression surface, that raw edge at the bottom of the front panel is a presentation problem.
The straight tuck end eliminates it. Both the top and the bottom closure flaps tuck in the same direction, toward the back panel. The front face is completely smooth from top to bottom. No raw edges. No visible tuck seam. A continuous printed surface, uninterrupted.
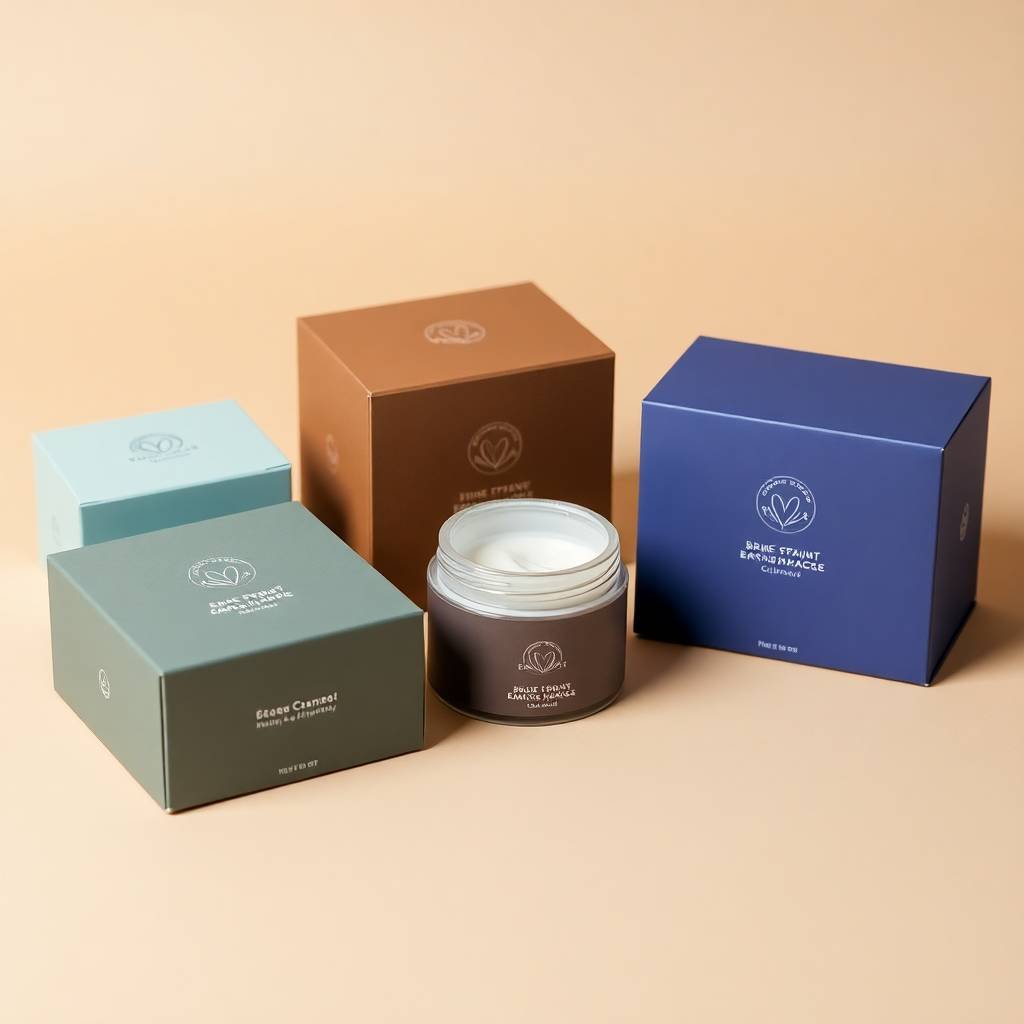
Custom straight tuck end boxes from Hexa Custom Boxes are built for applications where that front panel matters most: cosmetics, fragrance, premium health and beauty, pharmaceutical retail, and any product line where the box front is a brand billboard that must present flawlessly at retail.
How the Straight Tuck End Works: Both Flaps to the Back
This is the structural explanation that determines which tuck end format is right for the application, and that every competitor explains in one sentence without developing the implications.
A straight tuck end box is built from a single die-cut sheet. When assembled, the four sides form a rectangular tube. The top and bottom closures are panels attached to the front of the box that fold inward.
Both the top closure panel and the bottom closure panel fold in the same direction: from the front, through the interior of the box, and tuck behind the back panel. The tuck flap tab on each closure slides into a die-cut slit on the side panel and engages the slit lock, which holds the closure in position without tape.
Because both closures fold from the front and tuck to the back, the front face of the assembled box is a clean, continuous panel with no visible closure edges, no raw board edges from the flap, and no interruption in the printed surface across the full height of the box.
This is the defining feature of the straight tuck end format and the reason it is used over the reverse tuck end for premium retail applications.
The Slit Lock: Why It Matters and When to Specify It
Most straight tuck end boxes include a slit lock mechanism and most buyers do not know it is there or why it matters.
The slit lock is a die-cut slot in each side panel of the box. When the top or bottom tuck flap is inserted, a small tab on the edge of the tuck flap engages the slit slot and clicks into position. The engaged slit lock holds the tuck flap in its closed position rather than relying solely on the friction of the flap against the box interior.
The difference between a slit lock and a plain friction tuck:
A plain friction tuck relies entirely on the board pressing against the interior walls to stay closed. It works well for lightweight products in a single-opening application. Under product weight or with repeated openings, the friction weakens and the tuck can spring open.
A slit lock engages mechanically. The tab in the slot requires deliberate disengagement to open. It holds through product weight, repeated handling, and display on a retail shelf where the box may be picked up and set down many times.
For cosmetics, supplements, and pharmaceutical retail where the box is handled repeatedly by customers at point of sale, the slit lock is the right default. For single-use applications where the box is opened once by the end user, a plain friction tuck is sufficient. We include the slit lock as standard on straight tuck end boxes unless specified otherwise.
Straight Tuck End vs Reverse Tuck End: The Decision Every Buyer Should Make Consciously
Most buyers order a tuck end box without consciously choosing between straight and reverse. Here is the honest comparison so the choice is intentional.
| Feature | Straight Tuck End (STE) | Reverse Tuck End (RTE) |
|---|---|---|
| Flap direction | Both top and bottom tuck to the back panel | Top tucks to back, bottom tucks to front (opposite directions) |
| Front panel | Completely clean, uninterrupted | Bottom tuck edge visible on front panel |
| Front panel visual impact | Maximum: full-height continuous print surface | Good, but bottom edge visible |
| Material efficiency | Slightly more board per unit due to flap geometry | More material-efficient, slightly lower unit cost at volume |
| Peg display suitability | Excellent: hang hole zone and front panel both uninterrupted | Good, but bottom tuck edge near hang hole zone |
| Structural rigidity | Good for light to medium weight products | Slightly stronger base closure due to opposing tuck |
| Best for | Premium cosmetics, fragrance, health and beauty, pharmaceutical, peg display | General retail, pharmaceutical, FMCG, cost-sensitive high-volume |
| Cost at volume | Slightly higher due to board geometry | Slightly lower due to better board yield |
The straight tuck end is the right choice when the front panel is a premium brand surface that must present without visual interruption at retail. The reverse tuck end is the right choice when board cost efficiency is the priority and the slight bottom edge on the front panel is acceptable.
The Clean Front Panel as a Design Brief
This is the implication of the straight tuck end format that no competitor page develops into actionable guidance.
Because the straight tuck end front panel is a completely continuous printed surface from top to bottom, it is the maximum brand expression surface in the folding carton format family. The design brief for it should treat it that way.
On a reverse tuck end, the visible bottom tuck edge creates a de facto lower boundary for primary brand graphics. Most designers instinctively keep important graphic elements above that edge because the edge itself creates a visual interruption.
On a straight tuck end, no such boundary exists. The primary brand graphic can run the full height of the front panel without interruption. A cosmetics brand with a tall, elongated illustration or a full-bleed product photograph on the front panel can use the entire front surface. The brand image runs from the top closure line to the bottom closure line as one continuous piece.
Brief the straight tuck end front panel for the full available height. That is what makes the format worth the slight additional material cost over the reverse tuck end.
The Hang Hole Advantage for Peg Display
The straight tuck end is especially well-suited for products that hang on retail peg hooks. The reason is structural, not aesthetic.
On a straight tuck end box, both closures tuck to the back. The top of the front panel is completely clear: no closure edge, no flap overlay, no interruption. A hang hole die-cut into the top of the front panel (or into the top flap itself) sits in an uninterrupted zone of the printed surface.
On a reverse tuck end box, the top closure tucks to the back and the top panel is similarly clear. But the bottom closure tucks to the front, which means the bottom edge is visible on the front panel. This does not affect the hang hole directly, but it does interrupt the continuous front panel presentation that hanging retail display benefits from.
For peg display packaging where the full front panel is visible to the shopper as the box hangs at eye level, the straight tuck end’s uninterrupted front surface is a genuine visual advantage over the reverse tuck end.
The Board Waste Trade-Off: The Honest Cost Note
This is the one honest cost comparison no supplier page makes, and buyers making volume decisions need it.
The straight tuck end uses slightly more paperboard per unit than the reverse tuck end at the same box dimensions. The reason is the flap geometry: when both flaps tuck in the same direction, the die-cut layout on the flat sheet is less efficient in its use of the board area than the reverse tuck end layout where the opposing flap directions allow for better nesting during cutting.
At small volumes (100 to 1,000 units), this difference is negligible per unit. At high volumes (50,000 to 500,000 units), the board yield difference can produce a meaningful cost per unit difference.
If volume is high and the absolute front panel cleanliness of the straight tuck end is not required for the specific product, the reverse tuck end may produce a lower unit cost at scale. If the front panel presentation is the priority, the straight tuck end is the right choice regardless of volume and the slight cost difference is the price of a better-presenting box.
Tell us the volume and the presentation requirement and we confirm which format is the better value for the specific application.
Where Straight Tuck End Boxes Earn Their Keep
| Application | Why Straight Tuck End Fits | Recommended Material |
|---|---|---|
| Luxury cosmetics (lipstick, mascara, serum) | Full-height front panel for brand illustration, slit lock for repeated retail handling | 18pt SBS |
| Fragrance and personal care secondary packaging | Clean front panel for photography and brand image | 18pt SBS, soft-touch lamination |
| Pharmaceutical retail | Clean front for compliance graphics, slit lock, hang hole for peg display | 18pt SBS |
| Premium food and specialty retail | Full front panel for product photography, clean shelf presence | 18 to 20pt SBS |
| Health and beauty supplements | Hang hole in uninterrupted front zone, slit lock for retail handling | 18pt SBS |
| Electronics accessories (small footprint) | Clean front panel for product render, premium shelf presentation | 18pt SBS |
| Gift packaging (candles, accessories) | Full-height front panel for illustration, premium retail look | 18 to 20pt SBS |
Board and Material Options
| Material | Best For | Notes |
|---|---|---|
| 18pt SBS | Most cosmetics, pharmaceutical, and premium retail applications | Standard spec for straight tuck end format |
| 20pt SBS | Heavier products, premium gifting, added rigidity | More substantial closure feel |
| FBB (Folding Boxboard) | Applications needing stiffness-to-weight efficiency | Slightly lower GSM for equivalent stiffness |
| Kraft (uncoated) | Eco-forward, artisan, natural brand positioning | Front panel print behavior: dark inks best |
| Specialty (foil board, textured) | Limited editions, premium seasonal packaging | Board substrate carries foil or emboss effect |
Print That Uses the Full Front Panel
The straight tuck end format earns its slight material cost premium when the front panel is designed to take full advantage of the uninterrupted surface.
- Full-height, full-bleed front panel print with no design accommodation for a tuck edge
- PMS spot-color matching and full CMYK
- Spot UV on logo, product name, or key graphic element
- Foil stamping for premium cosmetic and fragrance positioning
- Soft-touch matte lamination for luxury hand feel
- Embossing on the front panel within the smooth continuous surface
- Window die-cut on the front panel positioned in the continuous zone clear of the hang hole area
How to Assemble a Straight Tuck End Box
The straight tuck end is one of the fastest hand-assembly formats. Here is exactly how it goes together.
- Start with the flat die-cut blank, printed side facing out.
- Fold the glue tab panel inward and apply glue. Fold the opposite side panel over it and press to bond the main tube. Let set.
- Open the tube into its rectangular cross-section.
- Fold the two dust flaps on the base end inward.
- Fold the base closure panel from the front panel inward and push the tuck flap tab into the slit lock slot on the side panel. Press until the tab clicks into the slot.
- Load the product from the open top.
- Fold the two top dust flaps inward.
- Fold the top closure panel inward and push the tuck flap tab into the top slit lock slot.
Total assembly time: 15 to 20 seconds by hand. Ships flat, assembles without tools or tape.
Packaging Expert Tip: Design the Front Panel Last
Here is the design sequence that produces a straight tuck end box where the front panel actually delivers its premium potential, and that most brands reverse.
Most design briefs start with the front panel: the hero surface, the most important, the one that gets the most attention and time. This is the right instinct. But for a straight tuck end box, it produces a specific error: designers treat the front panel as a fixed-size canvas and design within it, rather than first confirming that the panel height is optimized for the product.
The front panel height is determined by the box height. The box height is determined by the product. Before briefing the front panel design, confirm: is the box height, and therefore the front panel height, the right proportion for the brand graphic or illustration the design calls for?
A cosmetic brand with a tall, elegant illustration needs a tall, narrow box profile to give the illustration its full vertical impact. A brand with a horizontal product render needs a shorter, wider box profile. The panel proportion should drive the box specification, not the other way around.
Specify the product dimensions first. Determine the box proportion. Then confirm the front panel height. Then brief the front panel design for that confirmed height as a continuous, uninterrupted canvas. In that sequence, the front panel design is briefed for its actual dimensions and the straight tuck end format delivers what it is designed to do.
What Every Hexa Order Includes
These terms apply to every order without exception or fine print:
- No die charges and no plate charges, zero hidden setup fees
- Low 100-box minimum for test runs or full production
- 8 to 10 business day turnaround from approved artwork
- Free dielines and ready-to-use templates
- Free 24/7 structural and print support from real packaging people
- 100% recyclable board stock on every order
The Folding Carton With the Cleanest Front Panel in the Format Family
Both flaps to the back. Slit lock holding the closure. Hang hole in an uninterrupted zone. Front panel running top to bottom without a single edge or seam to interrupt the brand.
Get your free quote today. No setup fees, low 100-box minimum, delivered in 8 to 10 business days.
- 👉 Request a Free Quote
- 📞 Talk to a packaging expert — free 24/7 support
- ✉️ Email us anytime: hello@hexacustomboxes.com